A Good Looking Fake Brick – Continued
Veneer Bricks
The meaning of the term: “Veneer brick” has and is currently changing. Only a few decades ago, a hollow brick was considered a Veneer brick. Now though a Veneer brick is something different. Today, complete or near completely fake or faux bricks are manufactured and sold to be glued onto walls like thin tiles, or even installed in tracks with a mating rail glued or epoxied to the back of the thin brick veneer. You could maybe say that quarry tile was an early predecessor to the modern faux and or Veneer bricks.
The term “veneer brick”, as used in recent years, can mean modern veneer brick, modern replicas of historic brick or actual historic brick in which the brick faces have been cut from historic salvaged bricks.
These thin bricks are not just glued or mortared to the substrate wall like veneer bricks of the past, instead these new veneer bricks can be installed in a track set into or on the wall like a tile, but even where set in a track, a mortar and / or a grout must still be used at least slightly behind end at the joint area edges of each tile piece. (This happens to be a stark contrast to panel type faux bricks.) The track systems used in the veneer brick application simplifies the installation work, the labor of the construction, in several ways, because the layout and alignment can be guided by tracks. This means that lower skilled and lower trained workers can install the fake brick. As well though, a highly skilled worker also benefits by the guide and template because a higher skilled worker can install the brick much more quickly, as well.
The fake bricks that are used in these track systems are not as cheap though as modern bricks. Modern bricks are actually cheaper because a typical modern brick price is less than a dollar per brick. In many cases the fake brick faces will cost over $20 per square foot which is roughly $3 / “brick” facing. Also, salvaged brick faces can be purchased which are even more expensive in some cases.
The manufacturing process for using salvaged bricks is interesting. The salvage brick process, in a typical scenario where a full brick is being reused, would involve demolition of the existing wall assembly, then transport and cleaning of the bricks. Mortar must be removed and cleaned from the bed and head surfaces of the brick. Then once those faces have the old mortar removed, the brick must be sorted and stacked in a palletized or modular type of arrangement for shipping and freight transportation. This part of the process is the same or similar with the faux or cut face bricks. However, in the case of a panel type brick installation, the brick face must be sliced off of the existing brick. To do this, there are a few different methods. One of the methods for cutting bricks is a cubic zirconia blade on industrial machinery. Cubic zirconia blades are often used on job site saws, as well. The blades are expensive and are consumed relatively quickly in the process so the cost of cutting bricks on a mobile site is generally also very expensive, generally more expensive than the process used in a stationary plant. Cubic zirconia is a manufactured stone, very similar to diamonds in terms of hardness. Even fake diamond jewelry is often made with cubic zirconia. Although the material is actually manufactured and not natural, cubic zirconia is still relatively expensive for even small quantities used at the edge of saw blades.
An alternative method for cutting bricks in large scale manufacturing might be a water jet method. Water jet methods of cutting still require high amounts of power and obviously consume significant amounts of water in the process, but this methodology can be potentially less costly overall, in economies of scale.
In the picture below, we show an example of a kiln fired historic salvage clay brick that has been cut into relatively thin slivers. Particularly, the stretcher sides of that brick were sliced off in a salvage retrofit type application. The original historic bricks were harvested and then run through a manufacturing process which cuts off approximately 3/8 of an inch of the outer edge of the brick, along the stretcher face of the brick unit.
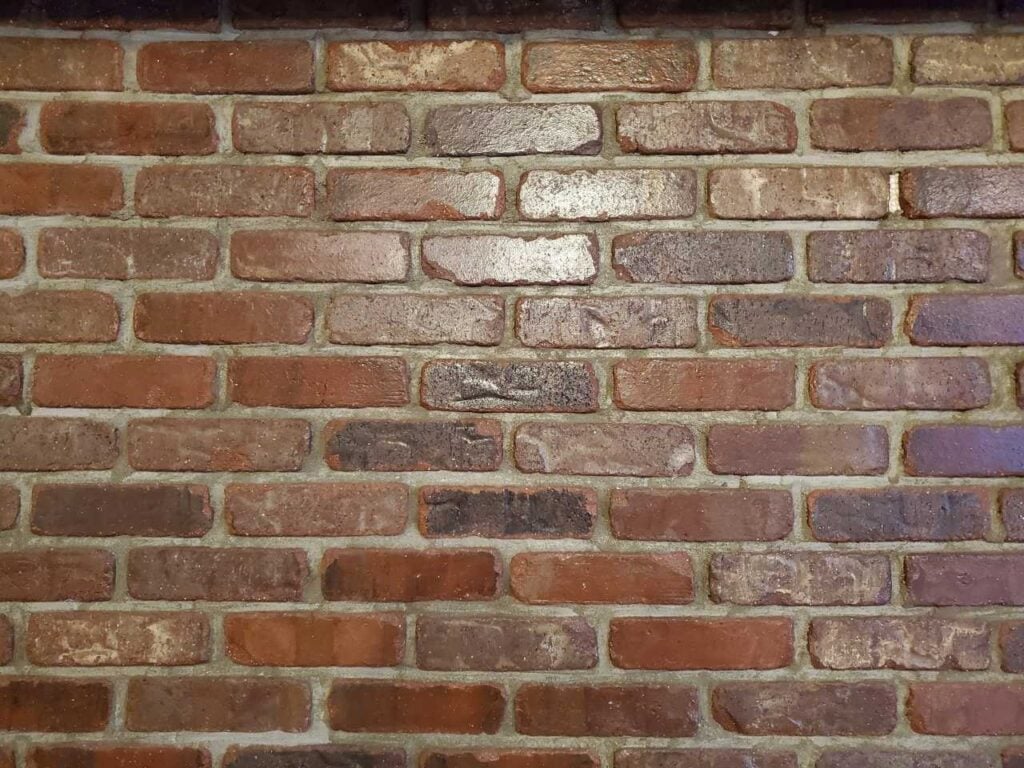
We show three different pictures of the installation of this fake brick below. The first picture shows the brick from a wide angle view, the field application, showing the greater context of installation.
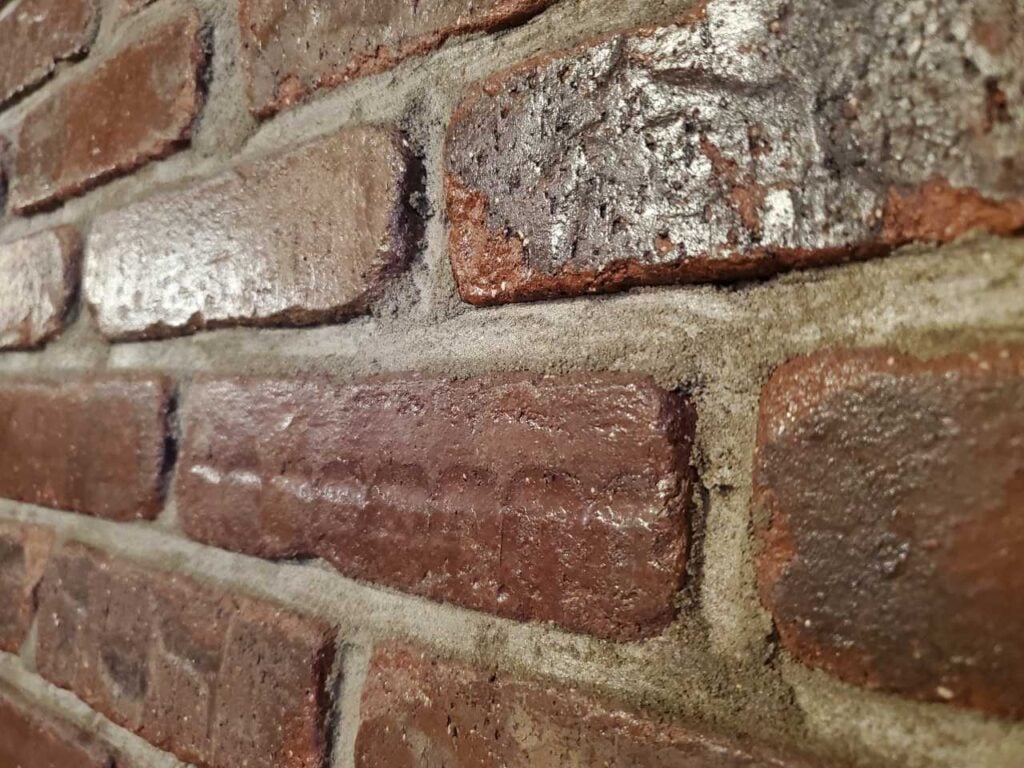
The next photo below shows the application from a closer perspective at an angle so you can see the relief of the brick itself and the recess of the mortar joint.
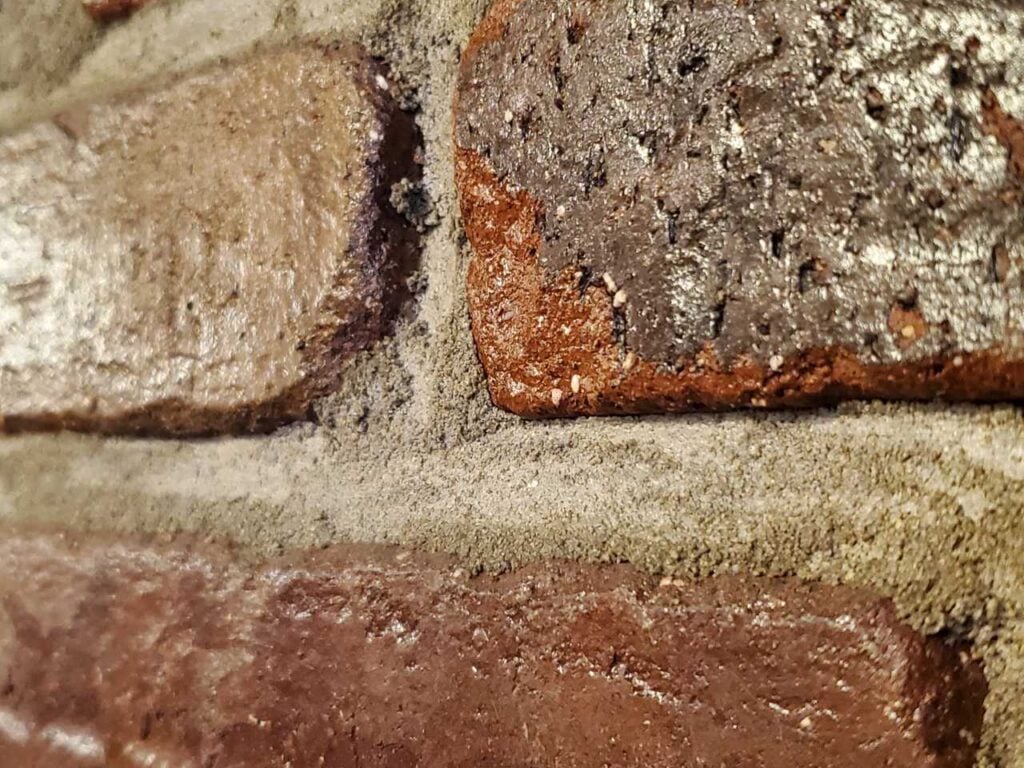
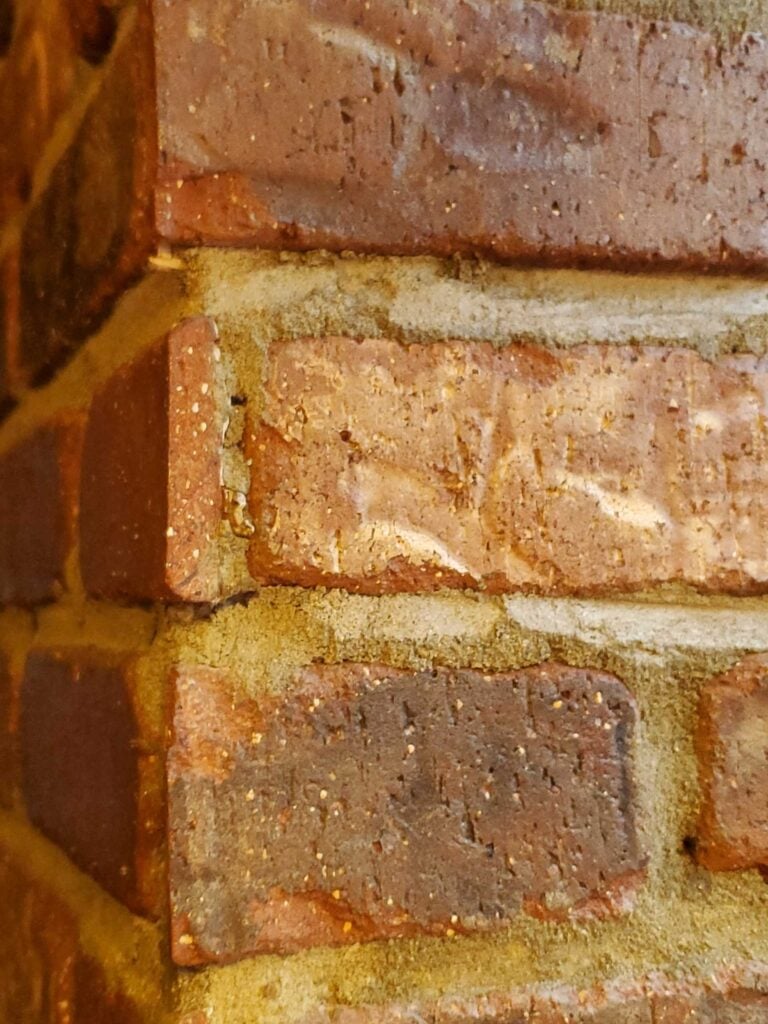
The next photo below shows the same brick from a very close angle so you can see the context and configuration of the brick next to the adjacent mortar joint.
This mortar used here, like a tile grout, is a modern grade Portland mortar. Modern Portland mortar should not be used in concentration like this with historic bricks. There are reasons though why this particular installation might qualify as an exception to the otherwise near all-encompassing rule.
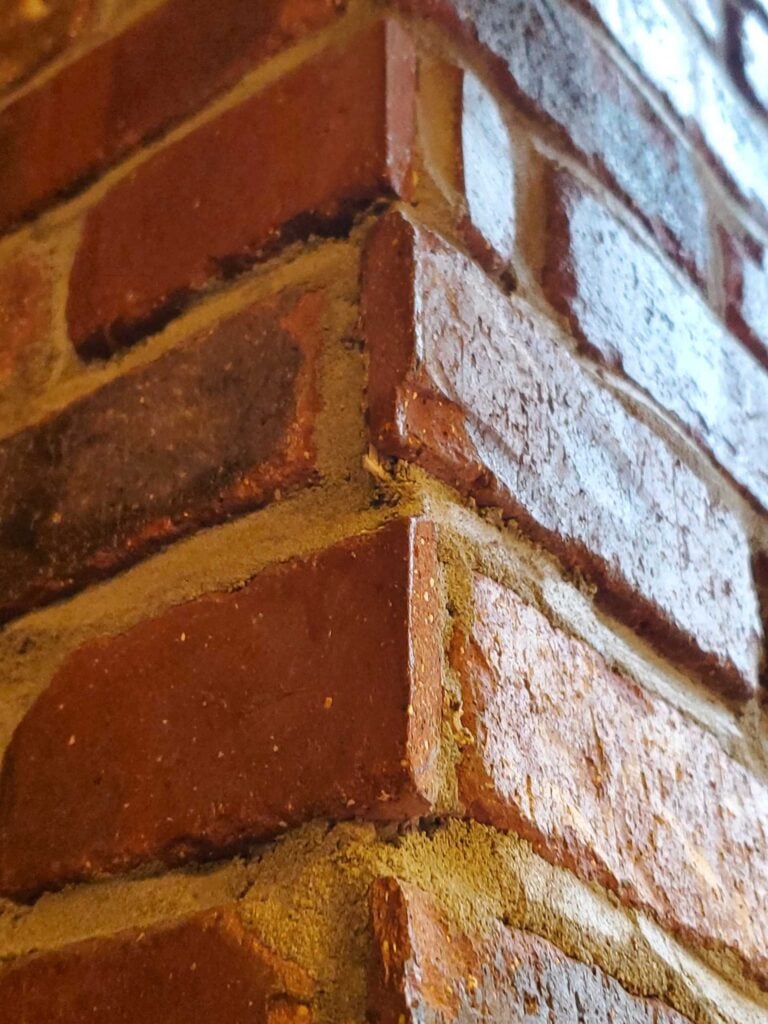
The image below shows a close up example of the corner. Unlike a full brick, in the case of a thin veneer brick like this, you can see the exposed thin fine edge. If it were instead a real brick, you would see the header face of the brick return back on the corner. The header face of a historic brick is approximately 3-3/8″ wide. The The header face, by comparison, is roughly only 3-5/8″ wide.
Like many common mosaic tiles which come with a textile reinforcement netting or backing which keeps the tiles spaced at particular dimensions and connected in a framework so they can be installed much faster together in a pattern in a wall or floor application, this brick-like tile application also has a textile backing. That textile backing increases the speed of installation but also allows for an additional element of embedment. In addition to the textile backing though this type of tile has another element which helps mounting, embedment, and spacing. It is set with a factory applied rail mating clip at the back of the tile.
Here at the corner, the factory applied guide is revealed. This is an outside corner, and unless the thin veneers bricks were very carefully mightered, cut on a 45゚ angle and joined near perfectly, you would be able to tell that this brick was fake. You can see the thin cut edge and you can tell that the brick is not solid. If the brick were solid, at every course, alternating one course to the next you would see the header facing of the brick at each course, instead of this telltale thin edge.
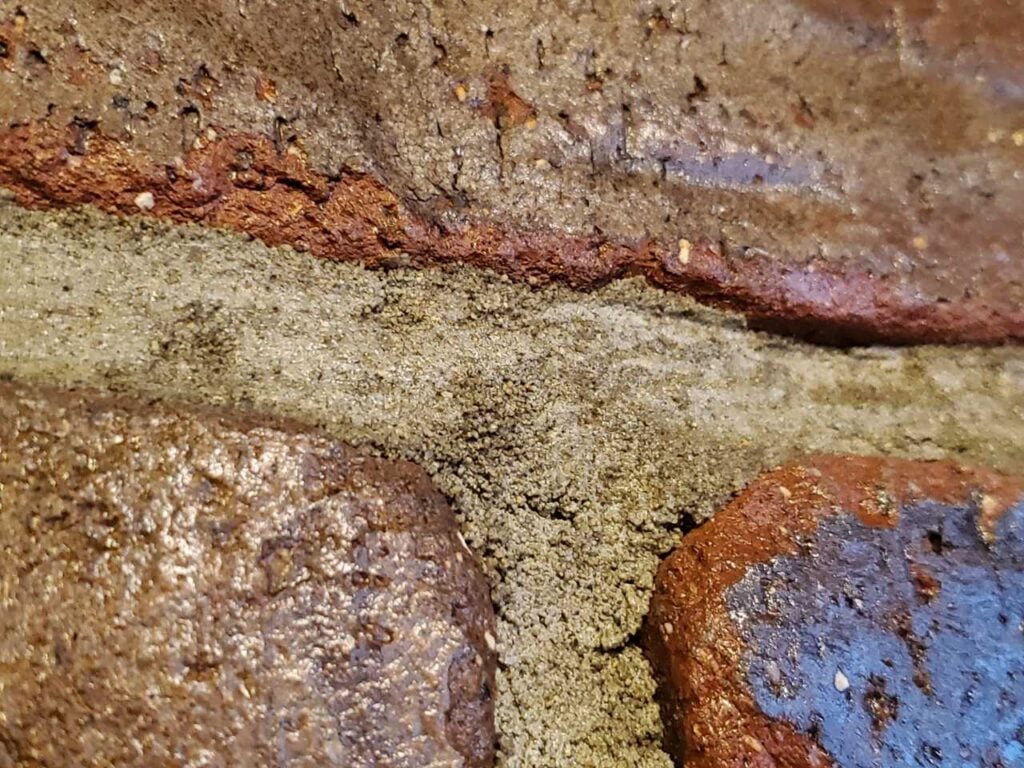
As a side note, at a glance, looking at the picture above it looks like the mortar joints of a historic brick wall which have been tuck pointed using improper or incompatible brick mortar. Since this isn’t actually real historic brick, the wall was never tuck pointed or repointed, at this location. When tuckpointing, repointing, and or conducting historic masonry restoration, it is extremely important to use the proper mortar which is compatible with the substrate in terms of structural resilience and permeability. We talk about the issues of tuck pointing and masonry restoration and the importance of mortar compatibility throughout our website, but it’s important to mention it again here especially when looking closely at mortar joints filled with modern mortar in lieu of historic mortar. Here in this unique example, the negative consequences of using an inappropriate mortar are negligible because the wall isn’t authentic and the “brick” is just an interior wall covering not a structural element of the building.
Panel Bricks
Panel bricks are the newest of all of the types of fake and faux bricks. A few decades ago, masonite or similar pressed wood by-product panels were made with a texture and paint finish that resembled brick. However these panels come manufactured in typical sheet good sizes, essentially 4′ x 8′ X ⅛ inch thick. The seams in those panels are easily discernible and visible from even relatively far distance across the interior room space. With some texture to outline these brick shapes, in some cases the panels might have fooled the eye, but by-and-large it was easy to tell that these panels were not real and just a cheap fakery. The definition between the mortar joints and the brick units was noticeable, although a texture or relief is applied in the panel, since the overall panel thickness was generally limited to ⅛” to 3/16″ thickness, the relief was also correspondingly limited and this detail didn’t fool the eye. Another point of visual failure of this early generation of fake brick was the texture of the brick itself. On the interior of a building, window light can often be very directional, meaning the light can often be at a glancing or low angle to the surface. Single source or concentrated light at a low angle to the surface of a material will show texture very clearly. In window light or sunlight of this type, makes it very obvious that the panels have too much planar consistency to be real.
Modern panel bricks are very different from hollow brick or veneer brick, Modern panel bricks, unlike the hollow bricks which are actually made of kiln fired clay or the veneer bricks which are actually thin slices of real brick or artificial pieces of tile that look like brick. Both of those examples are made from modern materials and even cast or fired at high temperature in a way similar to actual bricks. The example of panel bricks though is very different, in stark contrast to both of the other types of examples above. Panel bricks can be made from completely synthetic materials such as polyurethane or polyvinyl chloride. Essentially these synthetic materials are plastics or faux materials that are formed to look like brick but have almost nothing in common with brick other than the outward aesthetic.
To properly maintain, repair, and care for these historic buildings, a knowledge, interest and understanding of historic building principles is required. Here in Washington DC, historic masonry buildings are extremely expensive and the amount of financial loss caused by improper repointing and low quality construction is staggering. However, in addition to the direct financial value of the property, there is also a cultural loss when historic buildings are damaged. By comparison, consider neighboring poor cities, when historic buildings are damaged, it’s not just the loss of value to the property owner, there’s also a loss to all inhabitants and visitors of a city, present and future, who care about architecture, history, and culture.
We encourage all of our clients, and all readers of this article and to our blog in general, to prioritize the historic built environment of Washington DC and neighborhoods such as Capitol Hill, Dupont Circle, and Georgetown and become educated on on the difference between proper historic preservation versus improper work which leads to significant damage to the historic fabric of a building.
From a conservation and preservation perspective, several approaches can be taken to improve conditions related to deteriorated historic brick masonry. Primarily, lime mortar brick joints and low temperature fired soft red clay bricks should be inspected and checked on a routine maintenance schedule, either seasonally or at least annually. If brick masonry is kept in good condition, the life of embedded wood elements can be significantly extended. Hire a professional contractor which specializes, understands and appreciates historic construction elements and buildings.
In this article we talked about the terminology and concepts of historic masonry restoration, follow the links below for more related information from the IDS website:
- Binders in mortars and concrete
- Brick burns
- Butter joint
- Capillary action
- Cantilever
- Cementitious siding
- Cheek wall, masonry — Draft
- Chemical testing
- Code, building — Draft
- Cold joint
- Cold weather masonry work — Draft
- Damp proof course
- Downspout
- Electrical distribution panel — Draft
- Fenestration
- Ferrous metals
- Great Chicago Fire
- Green bricks
- Gutter, roof
- Lime mortar
- Lintel
- Load path
- Oriel window
- Oxidation
- Parapet coping
- Plug, clay
- Pressed bricks
- Raking, of mortar joints
- Raggle, aka reglet
- Rectilinear
- Roman bricks
- Roman arches
- Roof eave
- Roof termination
- Row buildings and row homes
-
- Rubbed bricks
- Rubble stone masonry
- Sand, Builder’s
- Sedimentary rock
- Scratch coat
- Sprung arch
-
- Squint bricks,
- Strike, or striking of mortar
- Tapestry bricks
- Tooth-in, interlocking masonry connections
- Vitreous
- Water diversion systems
- Zipper-joint
These concepts are part of the fundamentals of historic masonry restoration, tuckpointing, and brick repair.
The links in the list above will take you to other articles with more information on defects, failures, preservation and repair of historic masonry. You can learn a lot more on our blog. Feel free to check it out. If you have questions about the historic masonry of your building in Washington DC, fill out the webform below and drop us a line. We will be in touch if we can help.

